


Introduction
The purpose of these instructions is to help valued customers repair a faulty battery door and frame on the topside dual. These instructions aren’t entirely fool proof but should give you enough guidance to carry out the repair step by step. Only use genuine DOVPO replacement parts This repair is only for the new version of the Topside Dual as shown here DOVPO Battery Door Link
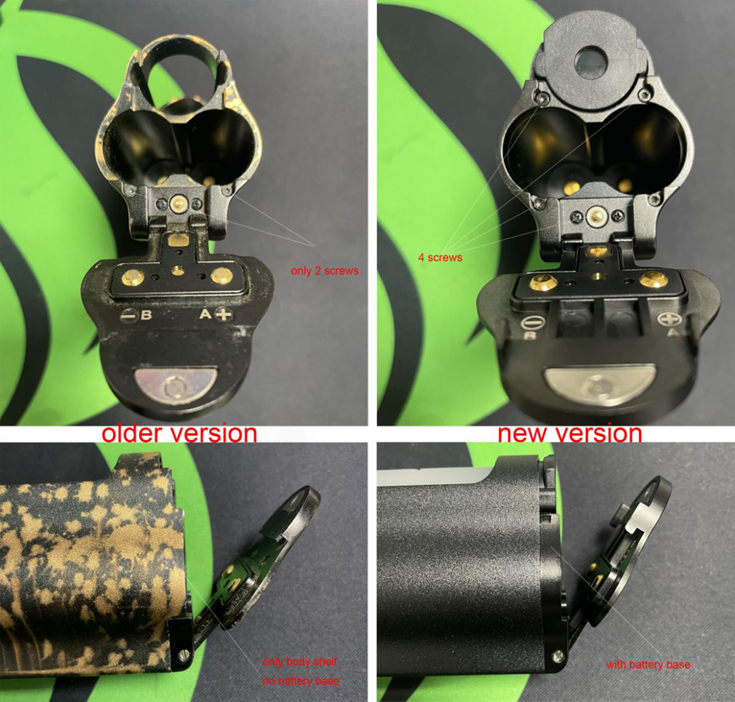
Old Version / New Version
Items needed
• Genuine DOVPO battery door and frame
• T5H Torx screwdriver
• 2mm slotted screwdriver
• 1.5mm Allen key
• PH0 Phillips head (crosshead) screwdriver
• Matchstick or similar
• Double sided sticky tape (just in case)
Step 1
The repair is laid out in 10 steps with photos were needed areas of interest are circled with a red circle.
Remove the battery door lid by unscrewing the 2No slot head hinge screws using a 2mm slot headed screw driver.
Step 2
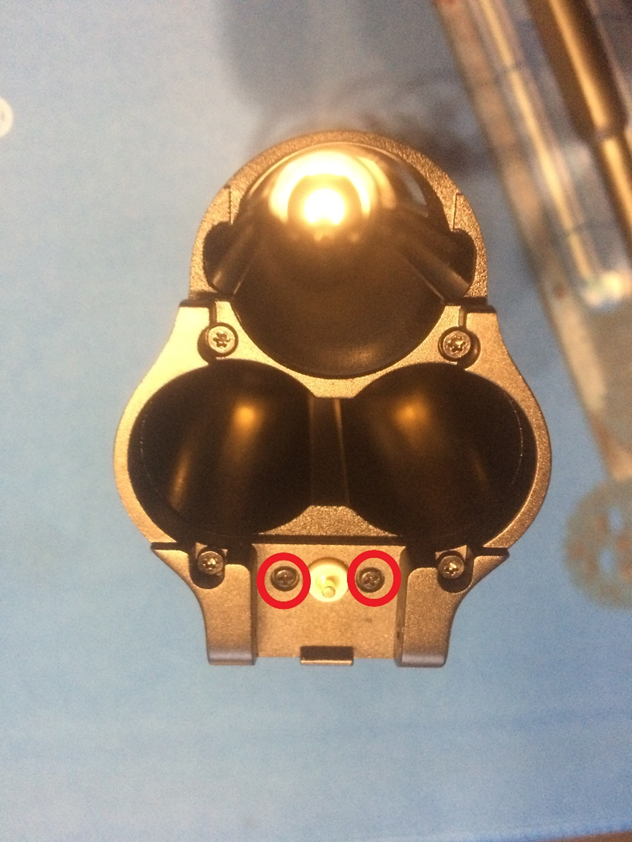
Remove the 4No TH5 TORX screws from the battery door base.

Step 3
Step 4
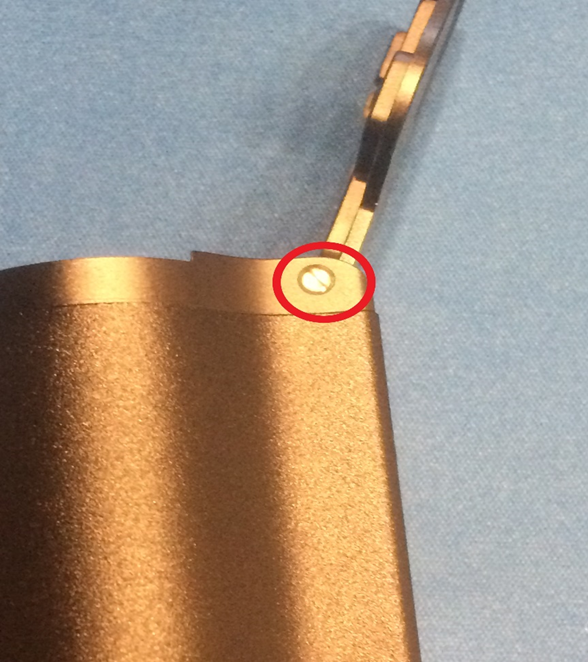
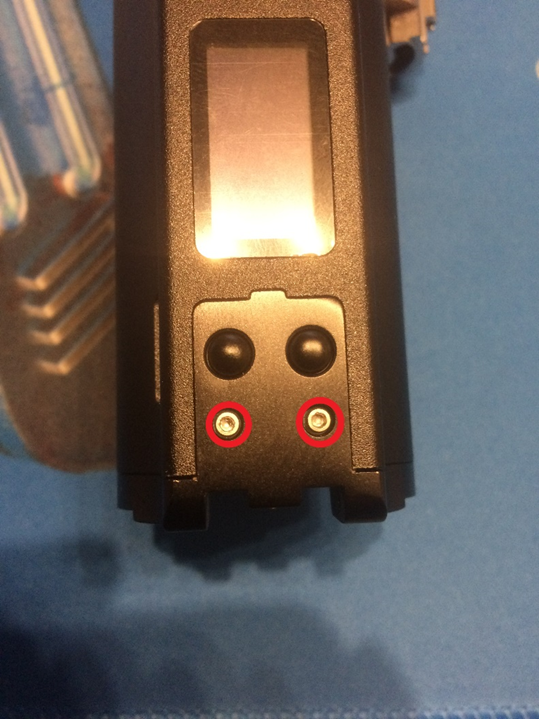
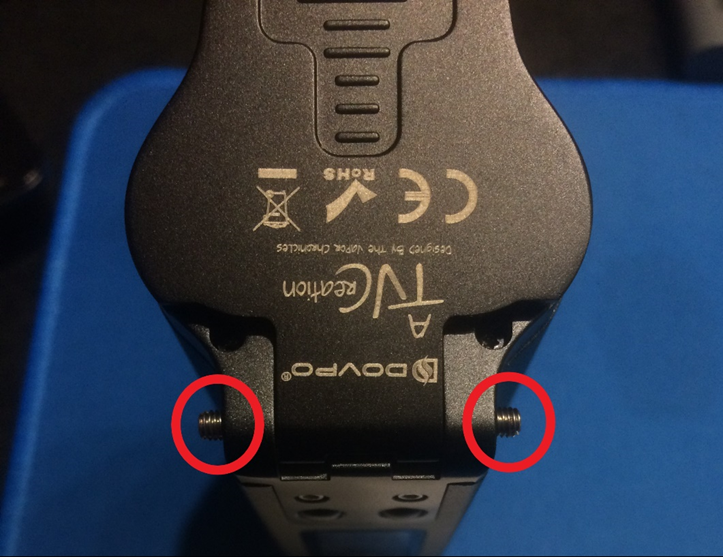
Remove the 2No Allen Key screws.
Step 5
At this point to aid you with Step 7, you might find it easier to fit sticky tape (double sided tape) to the +/- buttons. This might hold the buttons in place while you slide the Battery door frame off the housing.
Slide the battery door frame off the main body slowly. The +/- buttons will slide of with the housing so it’s important to keep them safe, they are also held/strapped together with double sided sticky tape so be careful not to damage it.
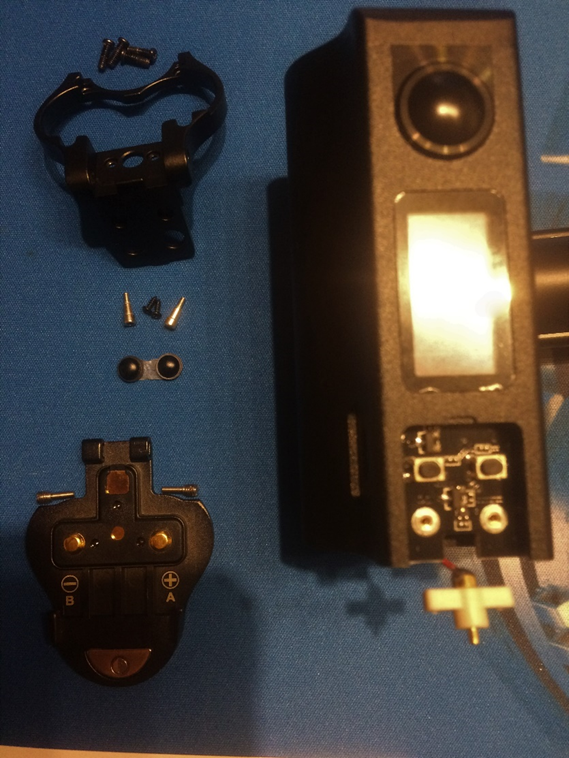
The picture shows the Topside Dual stripped..
Step 6
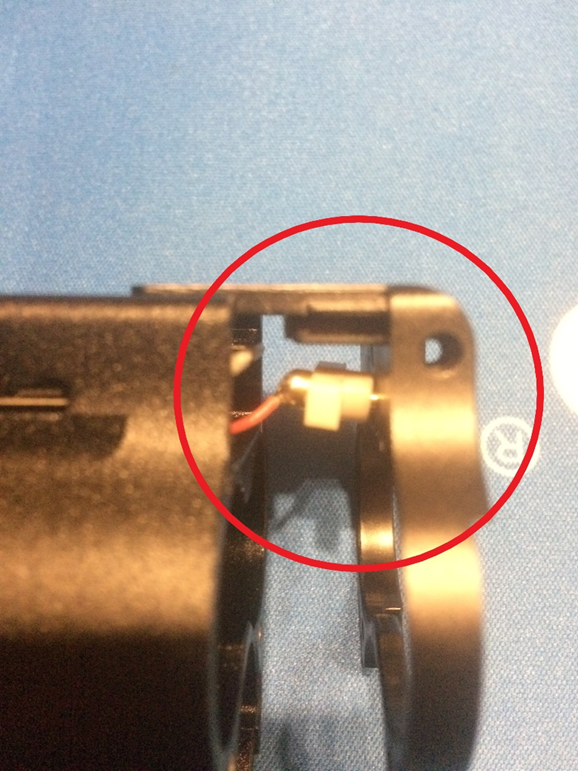
Fitting the new door and frame. For ease firstly push the battery pin connector into its location hole on the battery door frame and slide it back into position on the Topside frame (this will help you screw the pin connector back onto the battery door frame). Then screw the pin connector back onto the battery door frame using the 2No Phillips screws.
Step 7
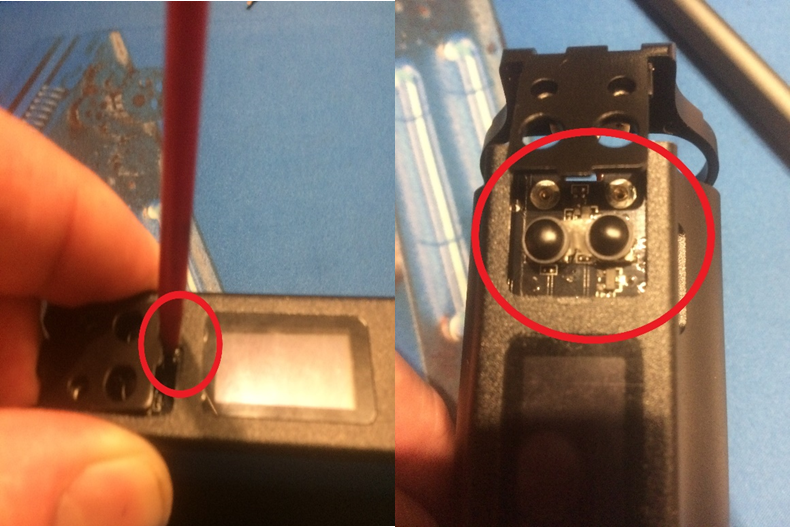
(1)This is by far the hardest step of the whole process. Place the button stoppers onto the buttons on the circuit board. Using a soft non-metallic stick i.e., Matchstick push the board down very gently. The board only needs to be pushed down a few millimetres so do this very carefully.
(2)As you push the board down slowly slide the frame into its location. Once done press the +/- buttons to make sure you can hear the clicks, if not the button stoppers have slid off the buttons so you will need to repeat the step. Possibly you may need to replace the double-sided sticky tape.
Step 8
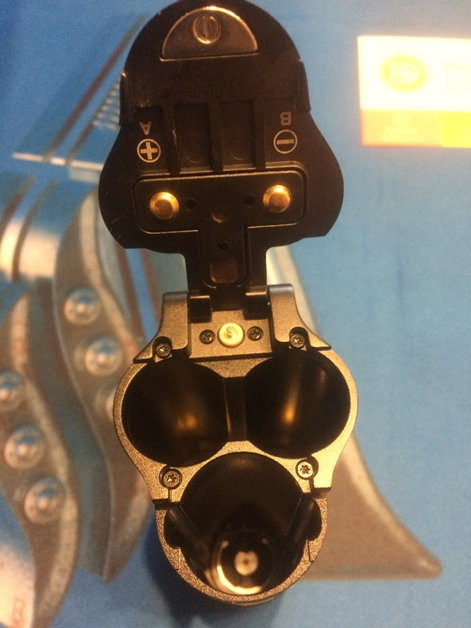
Screw in the 2No Allen Key screws under the +/- buttons. Only screw them in loosely for now.

Step 9
Screw in the 4No TH5 TORX screws on the base of the frame, again loosely. Once the screws are in place make sure the battery door frame is flush to the Topside Dual frame. Then tighten up the 4No TORX screws and 2No Allen Key screws.
Step 10
Place the battery door lid onto the frame and slide the 2No hinge screws through the hinge holes on the frame and into the lid itself. Then screw them in using the slotted screwdriver. If you find the lid is too tight loosen the hinge screws ¼ of a turn if this doesn’t work then the fame is not flush on the device so repeat step 9 to adjust the frame.
Congratulations All Done.


Comments
Success :) Count with at least 30 minutes of time.
So I have the old version it seems. But I was sent the new version. Replacement kit. How can I fix this? If there a way to make this work? I purchased a total of three, so is it possible to exchange the 3 I purchased for the 3 I need or just a refund if they are unavailable. Preferably I would like to fix my dual because I love this thing.
the magnet on my battery door seems to be upside down can I flip it?