


Hello Dovpo Community
With the increase of Abyss users around the world we decided to reach out to the Planet of the vapes community (POTV) to ask for help in creating a guide to assist Abyss users in taking care of there device.
This guide will help you strip the Abyss to clean up after any capacity leaks, condensation and could also prevent issues like sticky buttons.
The Guide was written by Vapers For Vapers and Dovpo’s only input was helping the community bring it together.
Planet of the Vapes has been a major name in the vaping community for almost a decade. Their daily news, regular guides and busy forum have become a trusted and reliable resource for vapers from all across the globe. Find out more at https//www.planetofthevapes.co.uk "
Hi Abyss Folks,
What follows should be an easy guide to maintaining your Abyss on a regular basis. Hopefully it will help you avoid problems down the line.
What you will need.
Kitchen Roll (towel)
Cotton Buds
Tin Of Compressed Air (optional)
Isopropyl Alcohol (Strongly Recommended)
Torx4 Driver
Torx6 Driver
Torx5 Driver (New Version)
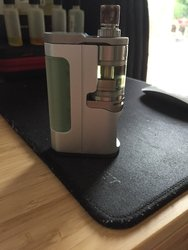
Firstly: We will take a quick look at “basic” stripping down of the 510 Deck. This is something that I do on a weekly basis with any Abyss running Readymade Coils such as the EUC, PnP, Caliburn or Aspire Bridges.

The first thing I do is remove the Drip Tip assembly, then remove the Top Plate completely and remove the Battery. Then remove the Tank from the Abyss. I always have Kitchen Roll on standby as there will be some Mopping Up required, firstly under the Base of the Tank as I remove it, followed by on the top plate of the 510 Deck.
I use Cotton Buds for cleaning IN the 510 Connector itself and then either Blow through the AFC holes, or use my can of Compressed Air.

This will remove any lingering residue caught in there.
For the next stage, you require a Torx4 Driver
(The newest Abyss and the Screws holding the 510 Plate in this one are Torx 5)
Remove the 2 screws on the 510 Plate and gently lift the Plate off the assembly, I use tweezers for this. Thoroughly Mop Up the Plate as particularly the underside will have Capacity/Condensation on it.

Next, GENTLY Mop Up the exposed top of the 510, you don’t want to use force as this could potentially unseat the O Rings.

Mop Up and check that AFC Holes are clear. Now things get slightly more tricky. GENTLY lift the whole 510 assembly enough to allow access underneath it, again I stress GENTLY does it.


I mop up with Cotton Buds under the 510 and then on the exposed body of the Abyss then repeat with an Iso Alcohol Cotton Bud and let the Iso evaporate.

Now flip the Abyss upside down so you are looking at the Base Plate. Change to a Torx6 Driver and remove the 4 screws, Longest are next to Control Buttons, Shortest at Rear.


GENTLY prise the Black Plastic Screen/ Button Carrier up from Body, Mop Up any residue that you find. There are 2 Torx6 Screws, one each side of the screen, remove these as well. Now you will have access to the Positive terminal in the Battery Housing


GENTLY tease this away from the Main body, clean everywhere with Cotton Buds and then repeat with Iso Alcohol. Mop Up where possible with Kitchen Towel and then Blast with Compressed Air (Optional)

Now return to the Control Buttons and clean up with Iso on a Cotton Bud.

Reassemble by first putting the 2 Long Torx6 screws back in in each side of the screen. Then… line up the Black Plastic Screen/Button Holder, Pop Up and Down Buttons back into Base Plate and offer it up to the Abyss which you are holding Base DOWN.
Pop the 4 screws back in place, select your Torx6 Driver and screw everything back together.
Now pop the Disk back on the 510 Plate and using your Torx4 Driver screw back on. IF you have found the AFC to be stiff, now try it before you tighten the screws right down, I find that once it’s tight enough not to move freely, that’s enough!! Don’t forget, as the Top Plate comes across the Top of the Tank, it will compress everything down tight.


And THAT, is my regular maintenance routine which has served me well thus far.
I hope that this description and the pictures will be of some help to you.
Cheers Now.


Comments
Thank you so much for posting this! I’m having some auto firing issues. Hopefully this helps. Definitely can’t hurt. Have a great day!