Rebuildables - what are they? What do they do? Do they do things? Let’s find out!
Alright, so you’ve been vaping a little while. You know the basics and you feel like it’s time to step up to rebuildables. As the name implies, rebuildables allow you to ‘rebuild’ your coil and wick in your atomiser. This has a few benefits, such as (usually) better options, being able to tailor your vape to your liking and so on, but the biggest initial win is cost saving.
Let’s say a coil for your tank costs you £3 and it comes in a pack of 4, so £12 for a pack. If you get a week out of each coil and no duds, we’re talking £156 per year on coils alone. If you get duds, that price goes up.
A 50m spool of 24g N80 will set you back about £10, and that’ll make you about 500 coils. A bag of cotton pads will set you back about £8. I bought one two years ago and have only just got through about half.

Now, it can get significantly more expensive if, like me, you suffer from shiny-itis. New atomiser? Ooh, yes please! Some fancy-shmancy handmade artisan coils? Shut up and take my money!
How much you spend entirely depends on you.
Now bear in mind that nothing I say below is a hard and fast rule. There’s a lot of variety in vaping, which means a lot of exceptions. This just goes over the basics.
Acronyms

Technically not acronyms but initialisms. Whatever. There are a few that indicate different types of atomisers:
- RBA - ReBuildable Atomiser - this technically applies to everything here, but usually refers to a rebuildable head that takes the place of a stock coil, such as in some AIOs.
- RDA - Rebuildable Dripping Atomiser - you drip your capacity directly onto your coil and wick. When it dries out, you add more.
- RSA - Rebuildable Squonking Atomiser - most modern RDAs also double as RSAs with the inclusion of a squonk pin. Some are better for squonking than dripping whilst some don’t come with a squonk pin. In general though, most RSAs also function as RDAs and vice versa. Wherever it says RDA below, include RSAs with that as well.
- RTA - Rebuildable Tank Atomiser - this is a rebuildable deck contained in a tank.
- RDTA - Rebuildable Dripping Tank Atomiser - a Frankenstein’s Monster of RDA and RTA. Usually an RDA-style deck, but with holes in to dangle your wicks through into a tank. Just to make it a little more confusing, sometimes they are squonkable, sometimes not.
Tools Required

There are quite a few vaping toolkits available, however it can be more cost-effective to put this together yourself. Personally, I spent about £20 on a small toolkit which did me well for a while, but if you want to put your own together then the below are what I consider essential:
- Diagonal/flush cutters (snips) - for snipping the legs off the coils (nail clippers will work as a budget alternative, but won’t last long)
- Tweezers, preferably ceramic-tipped
- Precision screwdrivers*
- Small scissors
These are recommended, but optional:
- Coiling jig/rod
- Hex/Allen keys*
- Needle nose pliers
*With most rebuildables you’ll get either a small screwdriver or a tri-tool which will work instead of these, but they are usually a bit rubbish. Proper tools will likely save you a headache, and you’ve probably got something suitable already lying about.
Some kits come with an ohm-reader. If you are building for a regulated mod, or have a regulated mod you can test with, then you could skip this. Some people like to use them for installing coils, but I’ve never bothered with them.
The main consumables you’re going to need are wicking material and wire. Let’s start with wire.
Wire

There are three main materials used for coils - Kanthal (FeCrAl or sometimes KA1), Nichrome 80 (N80) and Stainless Steel 316L (SS316L). There are others, but they are less widely used and can require some very specific usage, so we’ll stick to the main three in this post.
- Kanthal - this is probably the easiest to work with. Only works in power mode, not TC compatible. Some people get a metallic taste from Kanthal, but it’s probably the most resistant to degradation by the constant heating/cooling that vaping necessitates.
- N80 - Not TC compatible, lower resistance than kanthal. Some people are allergic to the nickel used in the alloy, so should avoid it.
- SS316L - this one works in both TC and power mode. Lower resistance than N80. Can be tricky to build with, due to its springiness. You also need to be careful not to overheat this wire as it can release some nasty chemicals if you burn off the oxide layer. Some types of stainless steel can also contain nickel, although at a lower proportion than N80. If you have a nickel allergy it’s worth bearing in mind.
My personal preference is for N80, but it’s all subjective. It’s worth experimenting and seeing which one works best for you.
Wire comes either in a spool, which means you have to wrap the coil yourself (hello coiling jig!) or as a prebuilt coil. Prebuilt coils are fine, although unless you’re going to spend a bit of extra cash on some nice handcrafted coils, they’re usually no better than something you’d wrap yourself from a spool.
Your preferred vaping style will also have an impact here. If you’re using a MTL atomiser, then you’ll want either simple round wire or MTL specific wire, such as MTL Fused Claptons. DL atomisers tend to be better suited to more complex, chunkier coils, but can also work with thicker round wire.
Wire thickness is measured in AWG (American Wire Gauge), sometimes shortened to ‘g’ - e.g. 24g N80. The lower the number, the thicker the wire.
There are loads of different complex coils available. I’ll explain four of the most common below:
- Clapton - a single core wire with thinner wire wrapped around it. Looks like a guitar string, hence the name.
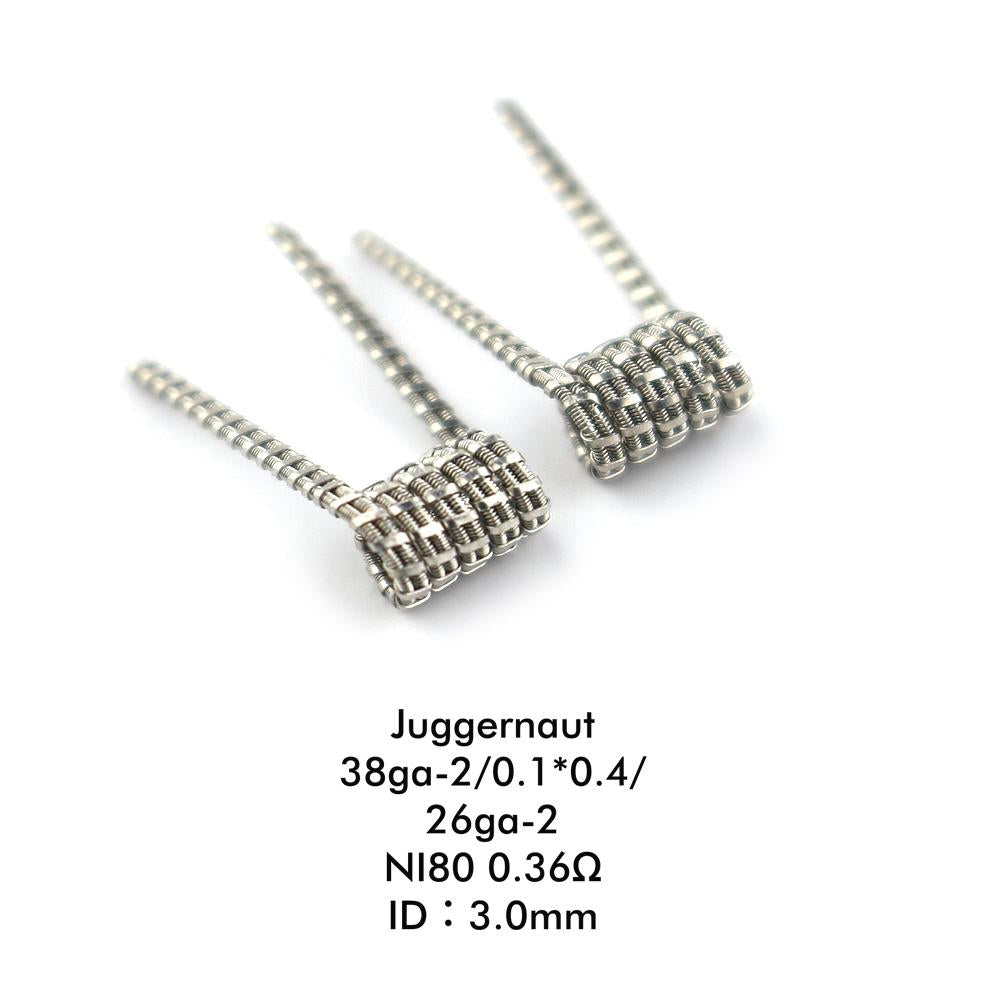
- Fused Clapton - the same as a clapton but with multiple core wires. Usually better performance in terms of options and ramp-up time (how quickly it gets hot) than a regular clapton.
- Staples - a fused clapton but with a stack of flat ribbon wire in place of the cores.
- Aliens - like a fused clapton except the outer wrap is wavy. This gives more surface area than a fused clapton, so usually more options.
If you’ve decided to use something more complex than round wire then I’d recommend starting with fused claptons. Fused claptons will perform a lot better than a single-core clapton, but aliens will perform slightly better than a good fused clapton. Aliens will also set you back a fair bit more money as they need to be handmade. Anything more complex than a fused clapton is a case of diminishing returns.
When looking at more complex coils then you’ll probably see something like ‘2 x 28/36’. If you’re getting high school maths flashbacks then don’t panic, it just means that there are two 28g wires with 36g wrapped around them. For a dual core fused clapton, you generally want a wrap that has a gauge of 10 +/-2 more than your core wires.
Wicking Material

There are also options in wicking material. Cotton is probably the most widely used, although there are various cotton blends, rayon and some atomisers (mostly older, although seeing a bit of a comeback) even use stainless steel mesh. Again, I’ll stick to the most widely used for the purposes of this article.
- Cotton pads - cheap and cheerful, marketed for makeup purposes. A roughly £8 bag will probably last you a couple of years. They can be a bit more faff than other options, but it’s easy to be consistent. Make sure you get organic and unbleached.
- Cotton strips - pre-cut, speciality vaping cotton such as Cotton Bacon. More expensive than cotton pads, but less messing about.
- Cotton rope/spools - similar to the cotton strips, just not pre-cut.
- Agleted cotton - looking a bit like shoelaces, these are the easiest to work with. Probably the most expensive cotton option, and you’re limited with what size coils they’ll fit, but super easy to use.
Choosing the right atomiser
So, how do you narrow down the gajillion options into a handful to choose from? First things first, do you want an RDA, RTA or RDTA?

RTAs and RDTAs can be tricky to wick. RDAs are a lot less fussy - you don’t need to worry about capacity flow, capillary action, tank pressure or any of that business. As long as the cotton is wet, you’ll be laughing. RTAs are second in the list. They all have their own particular ways of wicking, and some are definitely easier than others. Do some research and watch some wicking tutorials to boost your chances of success with an RTA. RDTAs would be last on my list of recommendations. Options is usually better than an RTA, however making sure they don’t leak can be a feat in cotton manipulation. Like RTAs, some are easier than others. Unlike RTAs, you could probably drip onto these and use it like an RDA if push comes to shove.
Second, do you want MTL, DL, or somewhere in between? There are lots of options, from dinky little 18mm MTL atomisers to gargantuan 40mm cloud-chucking personal weather systems. I like a bit of everything, so tend to have a range of atties in use at any one time, but some people stick to one type. It’s up to you.
The next thing to consider is single coil vs dual. Single coils are easier - getting one coil installed and glowing evenly without hotspots is easier than two. A general rule of thumb is single battery mod, single coil atty. Dual coil atomisers will often need more power to perform well, usually more than a single battery can safely output so bear that in mind. Most MTL atties are single coils, whereas DL atties can be either.
It’s also worth bearing your budget in mind. Atomisers can cost as little as £10, or way over £150. You’re probably best off sticking to the lower end of the scale, at least initially. Similar to coils, spending more on atties is a case of diminishing returns. The £60 RDA might be significantly better than the £10 one, but will a £160 handmade RDA give you a vape that’s £100 better? Probably not. Don’t get me wrong, there are some absolutely brilliant and gorgeous ‘high-end’ atomisers, but the mid-range ones probably offer the most bang for your buck.
Once you’ve decided on all that, the next step is to decide which one you want. YouTube reviews will definitely help, but most useful will be reviews from regular users so have a look on the various forums kicking about on the internet.
Okay, so you’ve got your shiny new atty and all of the gubbins to go along with it. What’s next?
Putting a build in
Your choice of atomiser will be the biggest factor in determining how you build your coil and wick it. With that said, there are some basic principles that will apply across the board. I was going to do a step-by-step guide, but honestly, this is probably better learned from a video demonstration. There are a plethora of tutorials on YouTube which will be much more helpful, so go watch those.
Some things that might not be covered by video tutorials, but you should still bear in mind:
- WASH YOUR HANDS - you filthy animal. Joking, but yes, you should definitely wash your hands before you start. Human skin (I’m presuming you have this) secretes all sorts of oils. Normally, this isn’t an issue, but cotton can soak some of these oils up and they taste nasty.
- Dry-burn your coils - you don’t need to get your coils white-hot, but you should always give them a gentle firing (without any cotton in) just to work out any hot-spots and get rid of any machine oil residue that might be hanging around. Don’t overdo it, just a gentle orange glow is fine.
- The ol’ Pulse & Strum - if you find your coil has hotspots (you probably will), pulse it gently, strum the coils with the ceramic tweezers, repeat. If you aren’t using ceramic tweezers, make sure you aren’t pulsing and strumming at the same time otherwise you’ll get a short.
- Trimming coil legs - take a bit of care when doing this. Coil legs have a tendency to ping off when cut, and it’s no fun losing a piece of wire only for it to turn up stuck in your foot. You should also watch for any trimmings landing in your deck - these will likely cause a short and either your mod won’t fire (resistance too low) or the bit causing the short will get very hot, release nasty chemicals and maybe even melt.
- Screw everything down - post screws, 510 pins etc.. If these aren’t screwed down fully then they can cause fluctuations in your coil resistance, or (again) shorts.
- Cotton swells up when soaked with capacity - if your dry cotton completely fills the capacity ports then it’s probably too much. Not so relevant for RDAs, but definitely something to bear in mind for RTAs and RDTAs.
- Cleaning coils is a thing - if you start getting muted or burnt options, take the cotton out, gently glow your coils and give them a rinse off. Repeat this a couple of times to get all the gunk off. Gently warm the coil one last time to dry it, put some more cotton in and you’re good to go again. Coils do degrade over time, but you should get at least 3-4 uses out of each set, depending on your wire material.
- Don’t overfill RTAs - when you put the top back on it can add pressure to your tank. If it’s already chock-full of capacity it can get forced into your deck, causing a gurgly vape and leaking. Leave a slight air gap at the top.
- Don’t fill up an RTA or RDTA all the way at first - if there’s something wrong with your build it’s much easier to deal with if you haven’t got a tank full of capacity to worry about.
- Watch out for plastics - some atomisers use Ultem or PEEK inserts to direct the airflow. Although these materials have quite good heat resistance, they’ll still melt if your coil is touching them so make sure there’s enough room. Your coil should only be touching the posts and the cotton, anything else will cause problems.
Wattage
One of the questions you see a lot is what wattage should I use for a particular atomiser. It’s very difficult to give a definite answer - the amount of airflow, chamber size/shape, coil resistance etc. all play a part. The biggest factor though is your coil mass. Low mass coils made with thinner wire and more surface area tend to need less wattage than a more bulky equivalent. Coil resistance generally plays less of a part than you might think, unless you’re using a mechanical mod (which is a whole other article).
Generally, start low and work your way up until you get a vape you’re happy with. There’s no hard and fast rules about how much power you should use, so a bit of experimentation will be key.
Summary
Rebuildables are easy once you get the hang of them, and really open up a world of possibilities. Much like vaping in general, there can be a bit of an upfront cost when first starting, however, once you’ve got all your supplies and you know what you like then that cost can drop significantly. Everyone is different though, so how much you spend is up to you. Some people don’t mind paying £12 for a pair of handcrafted coils each month, whereas others might prefer to buy a spool of wire and a big bag of cotton and be set for 2+ years. Either way, the options you have and the ability to tailor your vape to your exact preferences are much, much greater with rebuildables than with using stock tanks.
Whilst building and wicking might seem fiddly and intimidating at first, with enough practice you’ll get to a point where you can slap a new build in within a couple of minutes.
Do your research, be patient and you’ll be greatly rewarded.
Written By A Friend Of DOVPO UK